Sessions are the core of the Conferences i/o experience, representing a training, meeting, or event.
Session Details: Name, Date, and Time
Attendance Tracking, FOS, Codewords
Should this session be hidden?
Is this session an Agenda-only session?
Create a New Session
By default, all sessions on the Session Schedule Page are ordered chronologically by their assigned start/end time. If there is no start/end time assigned to a session, those sessions will be ordered alphabetically. If neither of these ranking orders is preferred, session rank can be assigned manually – see the Custom Session Ordering section for instructions.
- Sign in as an Admin
-
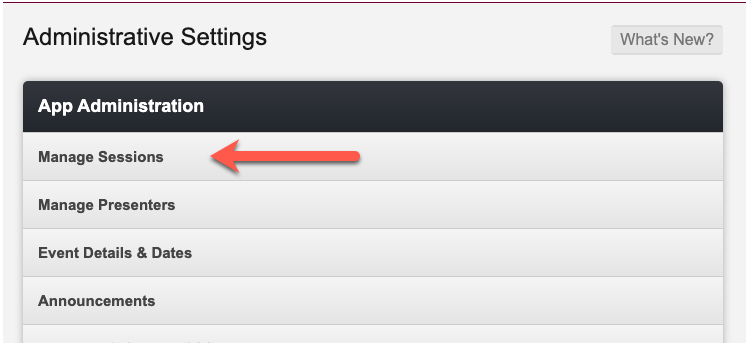
Click Manage Sessions
-
Click Create a New Session

-
Name and schedule the session, and enter any other optional details
- Click Save
Edit an Existing Session
- Sign in as an Admin
- Click Manage Sessions
-
Locate the session to edit and click Edit below the session’s title

- Update the session details
- Click Save
Session Details: Name, Date, and Time
-
Name of Session: The name of the session
- Appears on the Home page of the app and at the top of the session dashboard
- It is also the only required field when creating a session
- Note: To avoid issues with certificates not sending or incorrect characters appearing on the certificate, please avoid using special characters in session names. If the apostrophe isn’t saving correctly, delete and re-add the character using the ' key on your keyboard.
-
Location: The physical location of the session
- Appears under the session name on the home page
- Useful when creating an in-person or on-site session to direct attendees to the correct area
-
Date of Session: The day/dates that the session occurs
- Can span over multiple days; End Date is only required when the session ends on a different calendar day than it starts. If the same date is entered, it will be cleared on save.
- Required for automatically unlocking Session Evaluations based on the date/time a session is scheduled to end
- If the session date is unavailable, double-check the event dates selected on the Event Details page, and if there are dates in the fields, delete those.
-
Start Time and End Time:
- Required for automatically unlocking Session evaluations based on the date/time a session is scheduled to end.
For more information on managing time zones and event dates, see Manage Time Settings.
Attendance Tracking, FOS, Codewords
- Getting Started with Attendance Tracking
- Adding CPE Credits and Fields of Study to a Session
- Set up and Use CPE Codewords
Learning Objectives
- Up to 10 objectives can be added per session.
- Each objective can be evaluated separately in the Session Evaluation.
- When attendees join a session with learning objectives, the Learning Objectives bar will appear at the top of the screen on their device. By clicking the down arrow, a list of the learning objectives is displayed:

Metadata
-
Session ID: a customizable field for reporting
- Useful for teams that use internal code names of each session
- The Session ID will be included in reporting and can only be seen by the Admin
-
Session Type: a customizable field for reporting
- Useful for identifying sessions by type or category in reporting
-
Session Topic: a customizable field for reporting
- Useful for identifying sessions by topic in reporting
Advanced
-
Session Moderator Password: session-specific password for moderators
- This password overrides the global moderator password
-
Attendee Password: session-specific password for attendees
- Limit who can access a session by requiring attendees to enter a password.
- Attendees will be prompted to enter the password before they can join the session
-
Session Ordering Rank: a numerical order for custom sorting
- Useful when multiple sessions are scheduled to occur at the same time.
- See the Custom Session Ordering section for instructions.
Should this session be hidden?
- Check the box to hide the session and prevent it from appearing on the Home page.
- Sessions can also be hidden and unhidden on the Manage Sessions page by clicking the Hidden/Visible toggle below the session’s name.
Is this session a Q&A panel?
- Useful for sessions with more than 1 presenter.
- Checking the box and adding presenters to the session will add the option in Social Q&A for attendees to direct a question to a specific presenter in the session. As the attendee starts typing a question, a dropdown with all of the presenters assigned to the session will appear alongside an option for Anyone and Everyone.
- After the question has been submitted, both the moderator and attendee views will show the name of the presenter next to the question, indicating to whom the question is asked. Questions without the presenter name are directed to the entire panel.

- Administrators can identify which sessions are Q&A Panels by the label in the Manage Sessions area of the Admin panel. The presenters will also be displayed in this area for easy reference.
Is this session an Agenda-only session?
- Useful for Admins who would like to block off time for lunch or breaks in between sessions on the Home page.
- Agenda-only sessions aren’t clickable but are used as informational placeholders in the agenda.
- Below is a sample screen shot featuring several agenda-only sessions for things like when registration opens, when lunch begins or when there will be an afternoon break.

Presenters
- Presenters added on the Manage Presenters page can be selected and added to the session.
- Learn more here: Presenters.
Video Demonstration
Custom Session Ordering
Notes:
- Do not assign a date or time to the session as this will override the Session Ordering Rank. The only exception to this step is if you have two (or more) sessions with a date/time assigned that are scheduled concurrently.
- The higher-ranked sessions will be listed first. For example, if you're manually ranking 10 sessions, the first session on the list should be ranked at number 10.
- Sign-in to the Admin panel
- Create or edit a session
- Assign a rank number using the Session Ordering Rank

- Repeat these steps to specify the order for all other sessions.
Troubleshooting Custom Session Ordering
- Check your URLs Event Details & Date page: If there is a date entered:
- Remove the date
- Bulk Update the Sessions
- Remove the dates in the Excel
- Reimport the Sessions within the Bulk Update the Sessions.
- If the sorting issue persists, reset each session’s ranking by:
- Edit Session
- Delete the number in the session ranking field
- Save
- Edit Session
- Add the number back to the session ranking.
If you still need assistance, please contact our support team.