Bulk Update Custom Field Values
Migrate from Text-Based Custom Fields to Number, Date or Choice List
Custom Fields for Approval Requests
Overview
Custom User Fields allow you to manage additional attributes for the professionals in your organization. Custom User Fields are available as filters throughout LCvista and are used to create user groups.
For example, Administrators may need to create a group for all professionals located in a certain region. A group can utilize custom profile filters to achieve this type of segmentation.
Administrators can then choose to utilize groups for assignments, program catalog visibility, and other activities throughout the platform.
Add a Custom User Field
To add a custom user field, select the Site Settings hub from the left-hand menu.
Select the Custom User Fields tab. Then select Add Custom Field.
You will be prompted to enter the following:
- Custom Field Label
- Type:
- Choice List
- Date
- Number
- Text
- Paragraph Text
- Default Value (optional)
- Help Text (optional)
- Status: Active or Inactive
When you are finished, select Save.
Active custom fields are available on the People Properties page.
NOTE: Option to enable/disable User Visibility. When selected, the Display field on Profile Page allows end-users to edit the custom field.
Edit a Custom Field
To edit a custom field, select the Custom User Fields tab from Site Settings. Select the row action icon for the appropriate custom field and select Edit Custom Field.
Not all values are editable for custom fields. For example:
- Type cannot be modified once it has been created.
- For a Choice List, individual choices cannot be deleted, but status can be updated to Inactive.
Editing a custom field will also display the Custom Field ID utilized when populating custom fields via an API.
Set Custom User Fields to Inactive
The Custom User Fields tab in Site Settings is organized by All Statuses, Active and Inactive custom fields.
Custom fields cannot be deleted. Rather, you can choose to set the field to Inactive.
Inactive custom fields will not be displayed on the User Properties page. However, inactive custom fields will be available in the filter dropdown.
Reorder Custom Fields
To determine the order that active fields will appear on the User Properties page, select Reorder. Then drag and drop the individual rows on the Active Fields tab. A confirmation message will indicate the order has been successfully updated. When complete, select Done Reordering.
Custom Field Filters
Custom user field filters are available throughout the site to enable the selection of professionals based on their properties.
Groups
When adding a Dynamic or Static Group, select from the custom user fields in the Filter drop-down. The conditions available will vary depending on the field selected.
Learn more about Groups.
Reports
Custom user fields are available as filters for many reports in LCvista, specifically:
- People
- Compliance Detail
- Credit Type
- Learning Plan Status Highlights
- Overall Compliance
- Pending Session Records
- People by Jurisdiction
- People by Learning Plan
- Period Requirement Deadline
- Session Records
The conditions available will vary depending on the field selected.
Learn more about Reports.
Manage Attendees
To filter by custom user fields when managing attendees for a session, select More Filters from Available Filters on Attendees. The conditions available will vary depending on the field selected.
Bulk Update Custom Field Values
Use the People Bulk Upload to make bulk changes to existing values for people properties.
Please note that when updating a user's choice selection through bulk uploads, that selection must be created through the Custom User Fields tool first; it cannot be added as a new selection through Bulk Uploads.
Learn more about the People Bulk Upload.
Migrate Text-Based Custom Fields to Number, Date, or Choice List
Please follow these recommended steps if you are currently using a text-based custom user field and wish to migrate to a number, date, or choice list custom field:
- Generate a People Report to export all necessary data for any custom profile fields you wish to migrate.
For example, if you currently have a Hire Date custom user field that is a text field, and you wish to use a Hire Date custom user field that is a date field, use the People Report to export all users, and be sure to include the existing Hire Date custom field.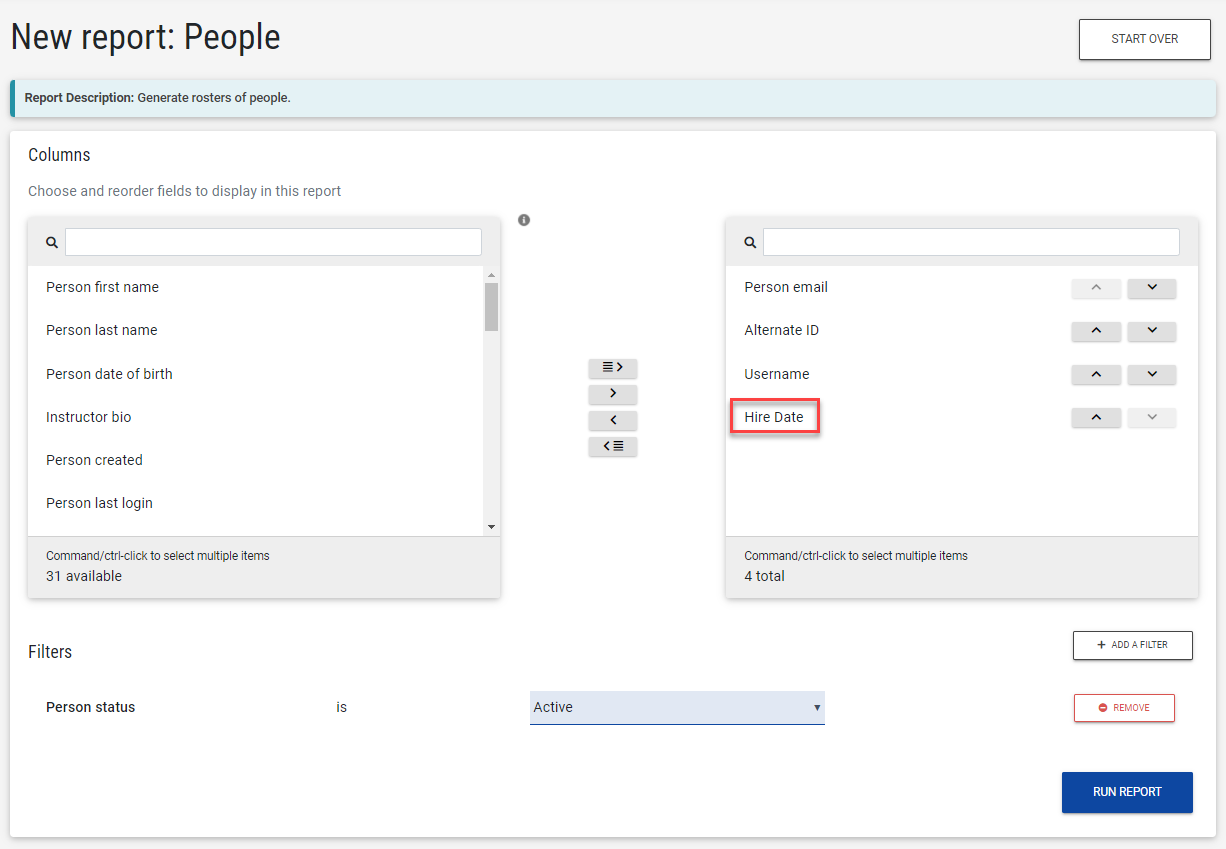
-
Rename and set the existing text-based custom user field to Inactive that you plan to recreate.
For example, rename Hire Date to Hire Date Old and set the field to inactive.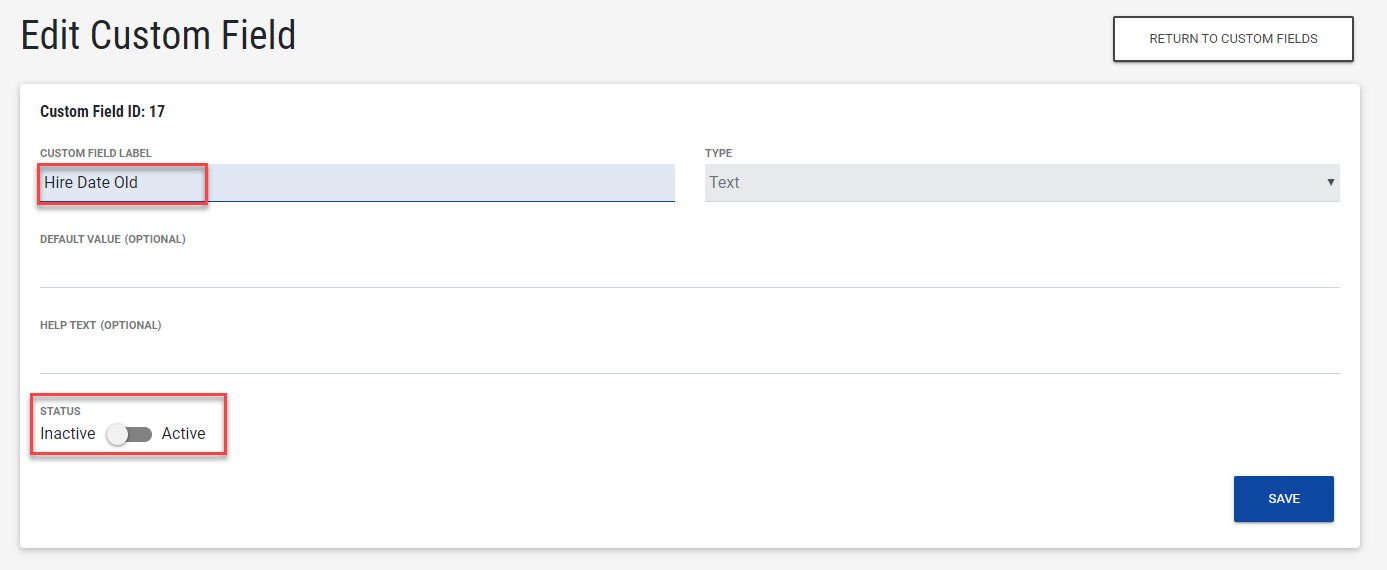
- Create a new choice list, number, and date profile field with the previously used name.
For example, create a new Hire Date field and set the type to Date.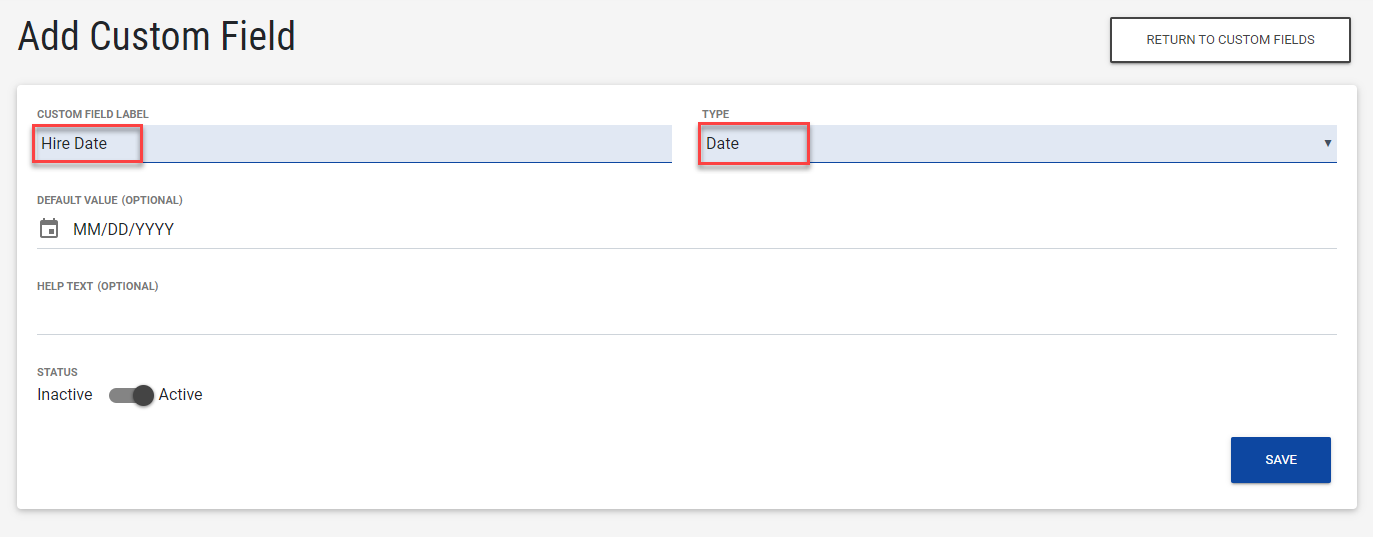
- Use the People Bulk Upload to remap old text fields to the new date/list/number fields.
In our example, the People Report can be used as the Upload template. The values for Hire Date will populate the new date-based field.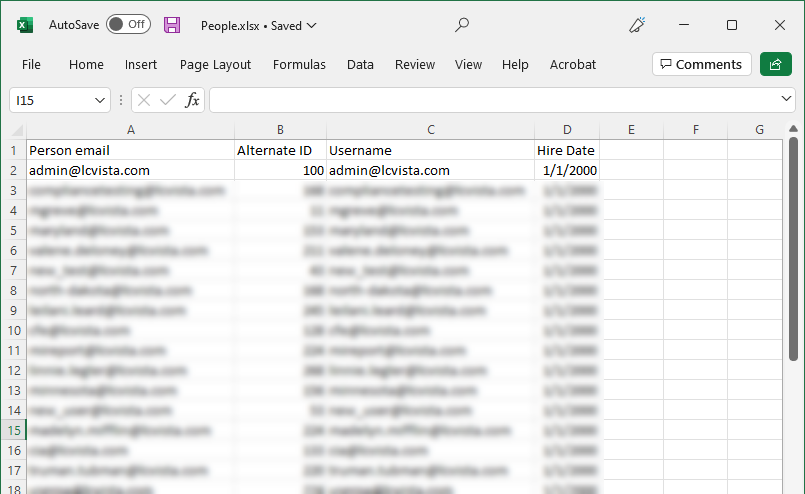
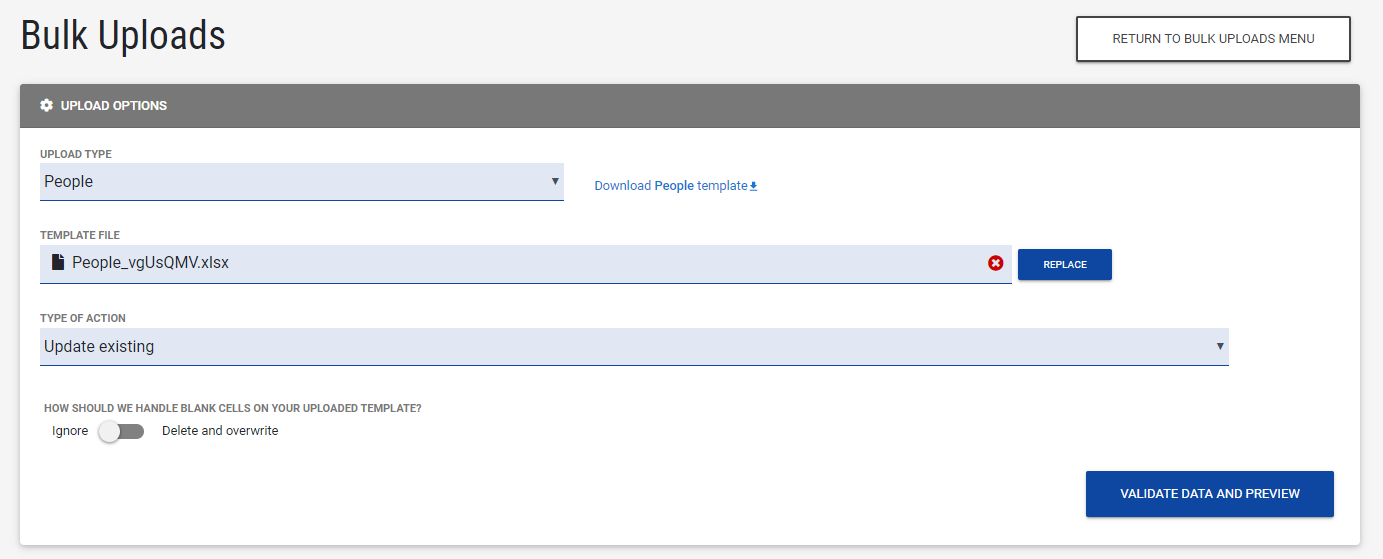
- The values from the text-based custom user field are remapped to the new date, number, or choice list based custom user field.
In our example, Hire Date now contains the appropriate values and is recognized as a date value.
-
Finally, remember to update any saved Groups or Reports with the new filters.
For example, any groups using the Hire Date Old custom user field will need to be updated with a new filter to use the Hire Date field.
Custom Fields for Approval Requests
Approval request custom fields are configured from the same admin page used for person custom fields, and is accessible through Site Settings within the Custom User Fields tab. When enabled, the Custom Fields tab will display two subtabs: Person Fields and Approval Request Fields each with its own search, active/inactive filter, and reorder controls. All setup below happens on the Approval Request Fields tab.
-
Create the field. Click Add Field to open the add/edit form and define:
Label – the display name shown to users and admins.
Key – auto-generated from the label but editable until the field is saved; once created, it's locked for edits.
Field Type – text, paragraph text, choice list, date, or number. Choice list fields expose an additional sub-input for defining the list of choices.
Default Value and Help Text – optional, same behavior as person custom fields.
Status – Active/Inactive toggle; inactive fields are excluded from reorder mode and won't appear on the approval workflow.
Once a field is saved, its key, field type, and (if applicable) choice values become permanent; only the label, help text, default value, status, and display configuration can be edited afterward.
-
Configure where and how the field displays. Each field includes a Display Configuration section with a collapsible panel per context:
Confirmation and Resolution Modal: set a display state (editable, read-only, or hidden) per approval action (Approve, Deny, Return for Review, Waive, Close for admins; Submit, Acknowledge for users). Only the performer of a given action can see a state configured for it.
History Table: set a read-only or hidden state independently for admins and users, since history is a record view rather than an action.
Each context also requires selecting which workflows (e.g., Add Jurisdiction, Modify Jurisdiction, License Compliance Incident) the field applies to; a field with no workflow selected for a context won't appear there. Any action left at "hidden" is simply omitted from what's saved, keeping the stored configuration lean.
Set the display order. Field order in both the approval UI and reports follows the order on the Approval Request Fields tab. Click Reorder to enter a dedicated reorder mode (this clears search/filters and shows only active fields with drag handles); drag fields into place and click Done Reordering to save. Inactive fields are automatically appended to the end of the list and aren't reorderable, since their position isn't meaningful while hidden.
Manage existing fields. Use the status filter (defaults to Active) and search box to locate a field for editing. Editing an existing field preserves its key and type — you can only update label, status, help text, default value, and display configuration.
Custom fields for approval requests are optional, but for firms that use them, having your fields, display rules, and ordering configured means the Credential Policy Manager captures exactly the information your firm's approval workflow requires. Learn more here: Credential Policy Manager.
Related to